
Motor Replacement
🛠 Tools Needed
4 mm hex wrench | White lithium grease | Loctite 222 (NOT 271) |
2.5 mm hex wrench | 13 mm crescent wrench | Small flathead screwdriver (2.5 mm) |
Needle nose Pliers | 17 mm crescent/socket wrench | Very small flathead screwdriver (1.5 mm) |
Zip ties | Reciprocating saw with metal-cutting blade (Sawzall or similar) |

When using Loctite, be sure screws are completely clean of any grease or oil, or the Loctite will not adhere.
The easiest way to do this is to drop screws into a jar with a small amount of 70% isopropyl alcohol--just enough to submerge the screws. Shake to loosen any oil or grease.
Drain the jar into the sink with the water running. Do not rinse or dry the screws.
Remove a Motor
🤖 Prepare the Robot
Ensure all power to Robot is OFF (breaker AND ignition).
Remove Robot battery.
Flip Robot onto its side to expose wheels.
Elevate the Robot for easier motor replacement. A workbench or even a truck tailgate are the ideal height.
Place a blanket or non-skid rubber pad on the work surface to keep the Robot stable and scuff-free.
Remove the Spray Guard and raise the Sprayer Valve assembly/Solenoid to its maximum to clear the work area and prevent any damage.
Use the 4 mm hex wrench to remove the 8 screws on the bottom of the Robot to free the bottom panel.
🛞 Remove the Wheels
Remove Spray Guard. (See the article: Remove the Spray Guard (Turf Tank One and One+))
Pop off center wheel caps with a flathead screwdriver.
Use 17 mm hex socket wrench to remove center wheel bolt and washers.
Slide wheel off axle to remove.
🛠️ Free the Motor
Slide hexagonal metal brackets off exposed axle. (May require a rubber mallet and screwdriver to loosen.)
The brackets may have tightened onto the axle. If they are too difficult to remove, try the following:
Heat the brackets with a pocket torch.
Wedge a sacrificed wood chisel in between brackets to pry apart.
Use a thicker, hard steel flathead screwdriver to help pry out the bracket.
Once you’ve removed the first bracket, you can use the same bracket to help pry off the second bracket as seen in the video.
If the brackets still won’t budge, spray extra penetrating lubricant into the hex brackets. DO NOT mix the pocket torch and lubricant as it may be flammable.
As a last resort,
Newer motors (late 2022 and on) have only a thin metal lock ring that does not need to be removed. Older motors (before late 2022) have a solid metal collar and require you to remove the long oval “key” slotted into the side of the axle to remove the collar:
Older motors: Use pliers or key tool to remove the key. (Pre fall 2022)
If the key is stubborn, try hitting the pliers with a hammer or mallet.
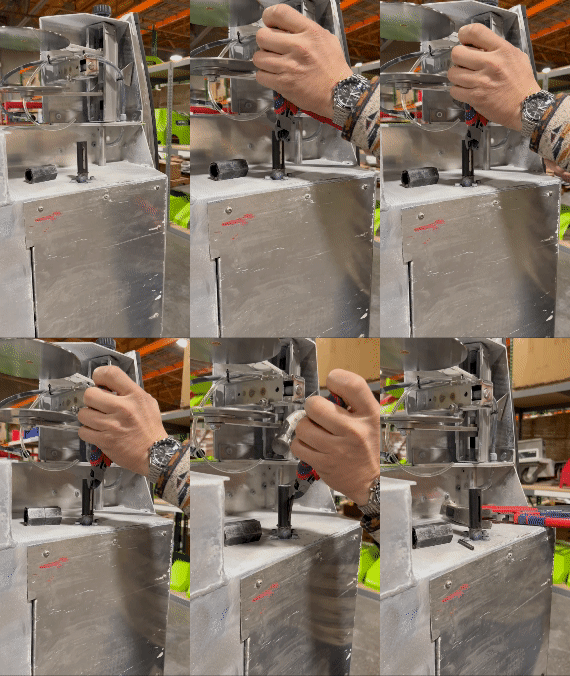
Both older and newer models: Loosen the screws holding the metal collar onto the axle with 2.5 mm hex wrench.
Do not remove screws, simply loosen until collar comes free.
Remove the four screws under the collar that secure the motor and axle to the Robot body with 4 mm hex wrench.
Remove zip ties binding the cables.
Use 13 mm crescent wrench to loosen bolt attached to plate on actuator.
Remove bolt, nut, and washers from actuator plate.
Pull motor and wheel axle out of the Robot chassis.
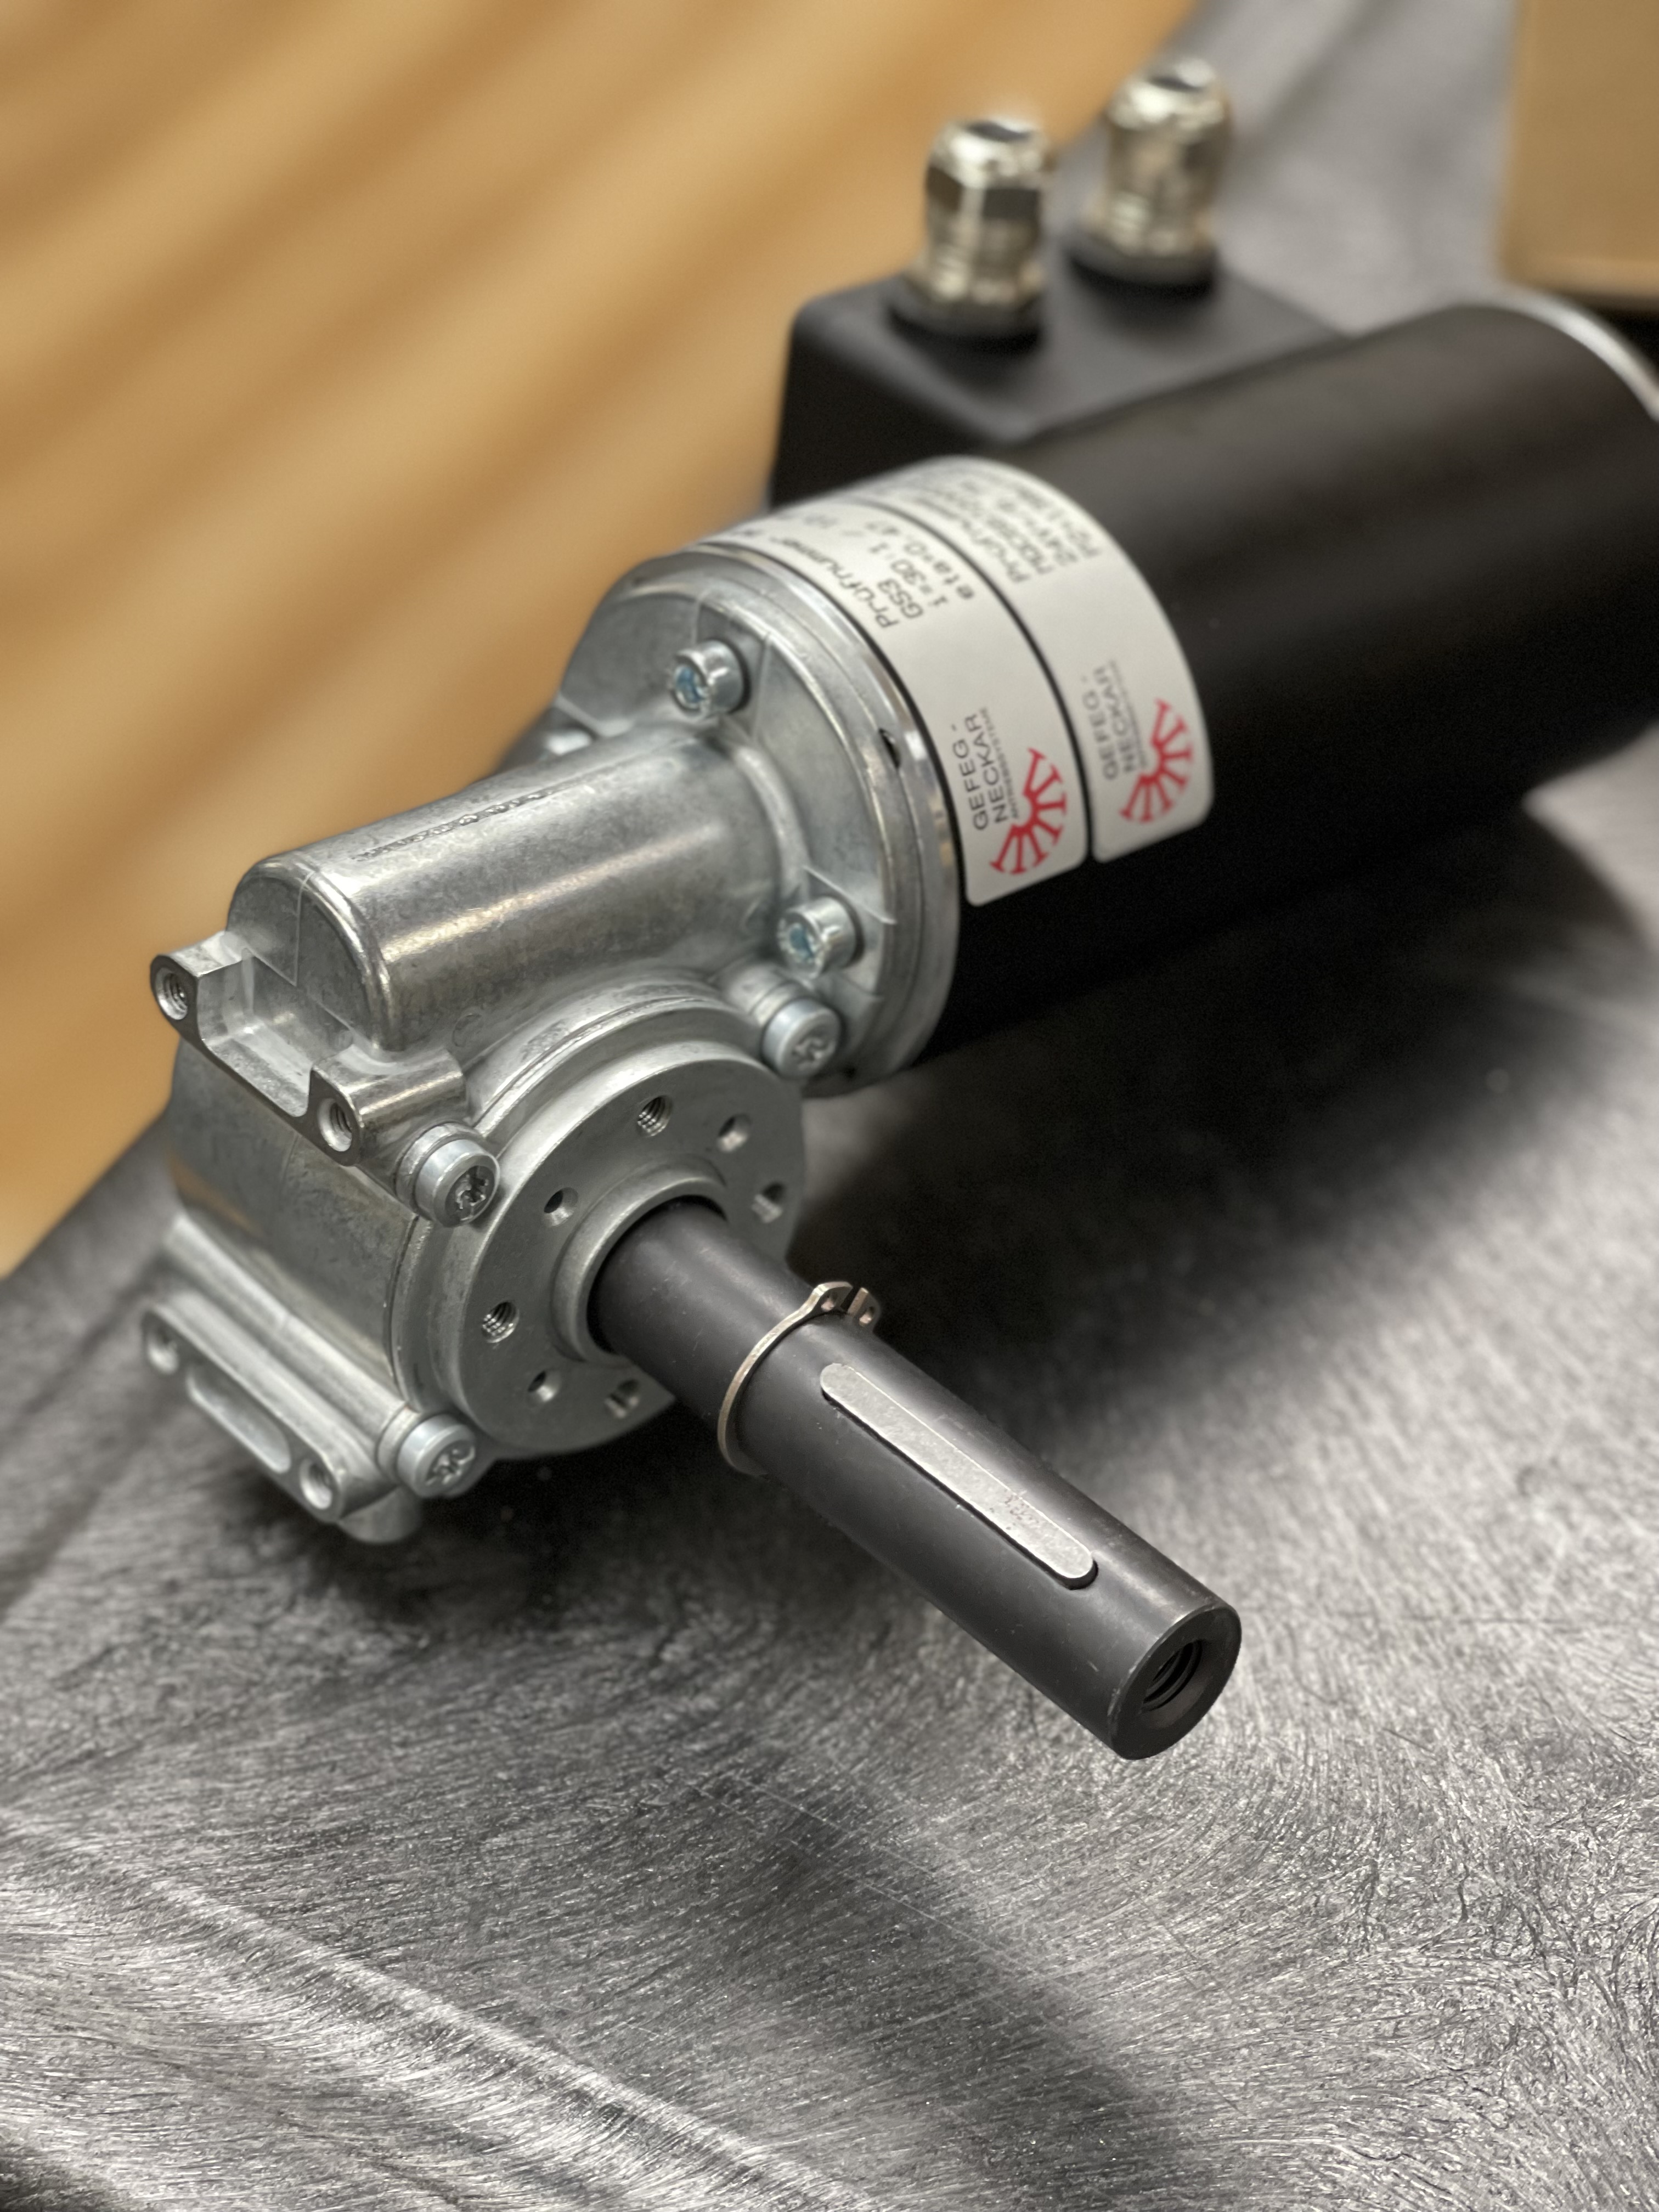
Newer motors (late 2022 and onward) have a lock ring below the keyway. You do not need to remove the to replace or install these motor types.
🔩 Disconnect Motor Wires
Remove lid on motor connection box using the 2.5 mm small flathead screwdriver.
Loosen the tiny screws securing the wires into their connectors with the 1.5 mm very small flathead screwdriver.
Gently pull the wires from their connectors with needle nose pliers.
Loosen the bolts around the cables coming into the connection box with a 6-inch crescent wrench.
Ensure that the gray plastic caps are securely seated in the bolts.
Gently pull the cable out of the connection box and free from the motor.
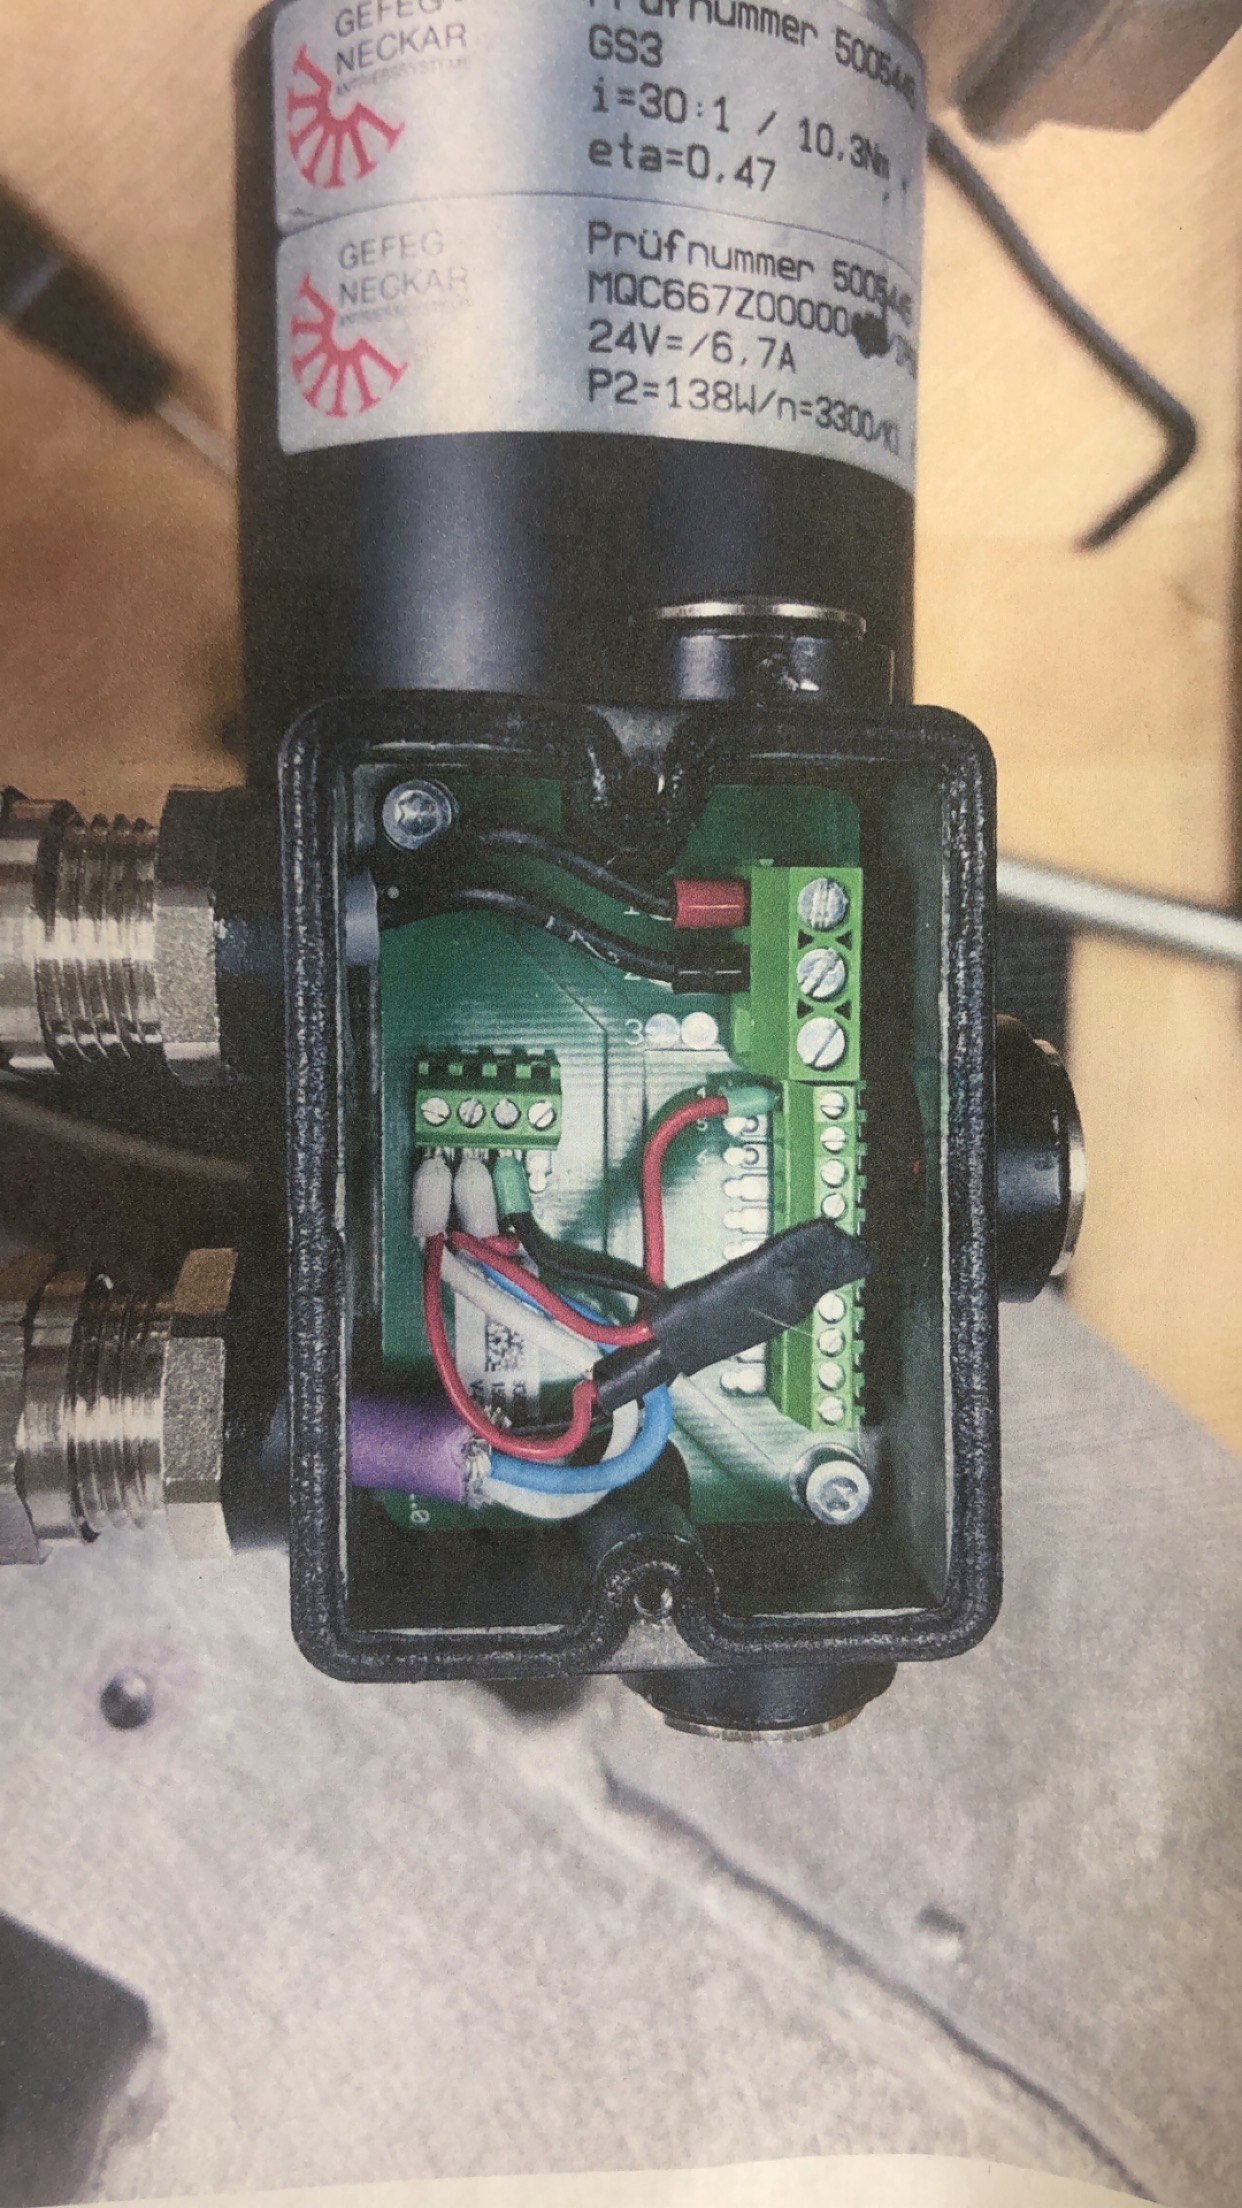
Wire connections inside the motor box.
Install a Motor
If you are swapping motors, you can begin from “Connect Motor Wires” below.
If you are installing a new motor on a Robot that did not have one, follow the instructions to “Open the Robot” above. Then continue with the instructions below.
🔩 Connect Motor Wires
Loosen the bolts on the new motor.
Thread the purple cable through the metal coupling and gray plastic cinch ring, then through the bolt and hole in the connection box closest to the end of the box (bottom of the photo).
Thread the gray cable the same way through the other hole in the connection box (middle of the photo).
If this is a new install, check to make sure the tiny screws on the connector slots are loosened.
Connect the wires (following the diagram and listing below) to the appropriate connectors.
Wire connections inside the motor box.
Purple Cable
The purple cable contains four wires to connect:
White and red combined.
Blue and red combined.
Black single.
Red single.
Three of these wires attach to the connector slots on the small connector block close to the cable entry point. All the connector slots are numbered.
White/Red goes in the first slot, marked 14.
Blue/Red goes in the second slot, marked 15.
Black goes in slot 16.
The #4 single red wire from the purple cable connects to the first of the smaller connectors along the side of the connector block (opposite side of the box from the cable entry point) in the slot marked 4.
Gray Cable
Red (big wire) [Slot 1]
Black (big wire) [Slot 2]
For All Wires:
Tighten the screws to lock the wires into place.
Secure black motor lid back into place.
Tighten the screws.
Tighten the metal coupling through which the wire feeds into the connection box.
Repeat the above steps to replace the other motor (if necessary).
📘 Reassembly
Place wheel axle back into its respective location (Right vs Left).
For left motor, wire connectors from black box should be facing up.
For right motor, wire connectors from black box should be facing towards the back metal plate away from you.
Place actuator bolt back through arc-zone of the metal plate, then hand tighten nut to secure the bolt can’t fall through anymore. Leave enough slack so the actuator plate can still move.
Secure wheel axle using the four bolts.
Place Loctite on the bolts before screwing them in to aid in keeping them secure.
Fasten tightly with 4 mm hex key.
Coat axle with lubricant and place the collar on the wheel axle with the narrow end facing down. Keep it slightly raised, a few millimeters away from flush.
Tighten the collar’s side screws using the 2.5 mm hex key.
It the key was removed, coat the key hole slot in the axle slot with lubricant and replace the metal key into the slot.
If using the hex couplers, necessary, lubricate entire outside wheel axle and slide both couplers onto the axle over the key.
Place the front wheel onto the axle over the hex couplers.
Secure the 17 mm bolt holding the wheel with the socket wrench.
Relace hub cap on the wheel over the bolt
Repeat for other wheel.
View the https://support.turftank.com/en/video/current/motor-swap-turf-tank-one videos for more details.