
Unboxing the Robot Crate

Inspect Robot crate upon delivery for damage!
If the crate is damaged, follow these steps: Receiving the Robot Crate
Unpack a newly received Robot in four stages:
1. Open the Crate
Place the crate on a level surface with enough space to move completely around the crate.
Remove the eight black box clips that secure the lid of the crate to the sides.
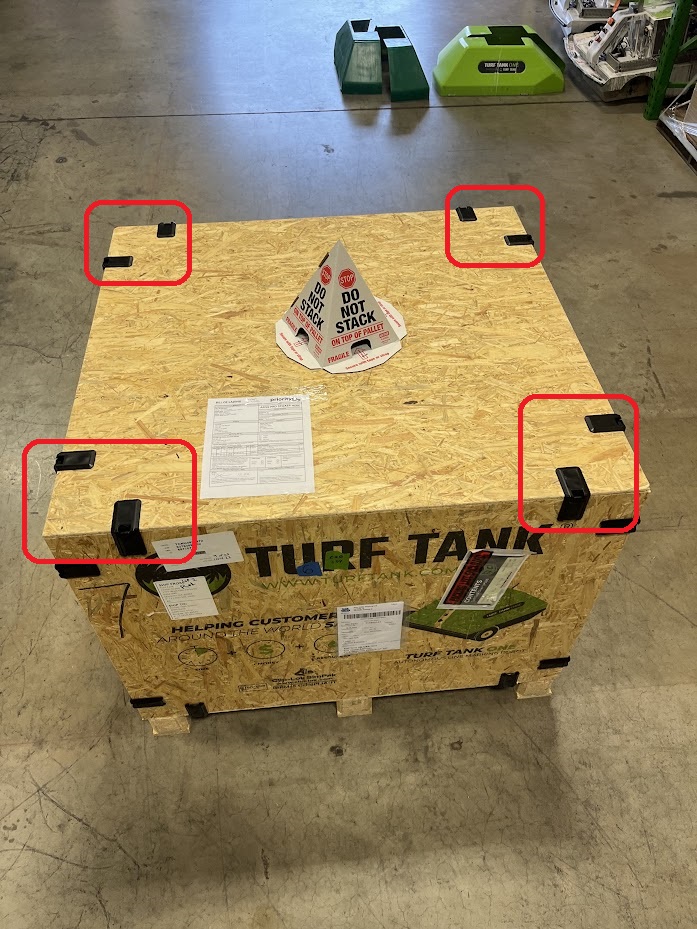
Lift the lid off the top of the crate.
Place the lid out of the direct work area.
This may require two people.
Find the Crate Contents checklist.
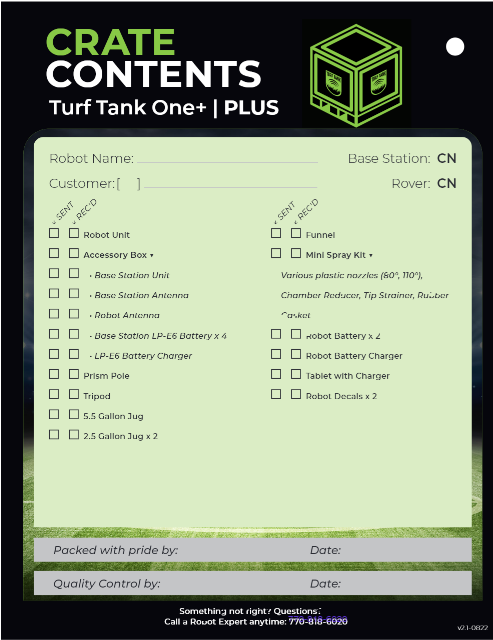
Refer to this checklist throughout unboxing.
Mark off items on the checklist as you remove them from the crate.
Pull out the long yellow bag containing the Prism pole and the long red bag containing the tripod legs from the top of the crate contents.
Remove the corner bolsters that hold the Prism pole from the crate.
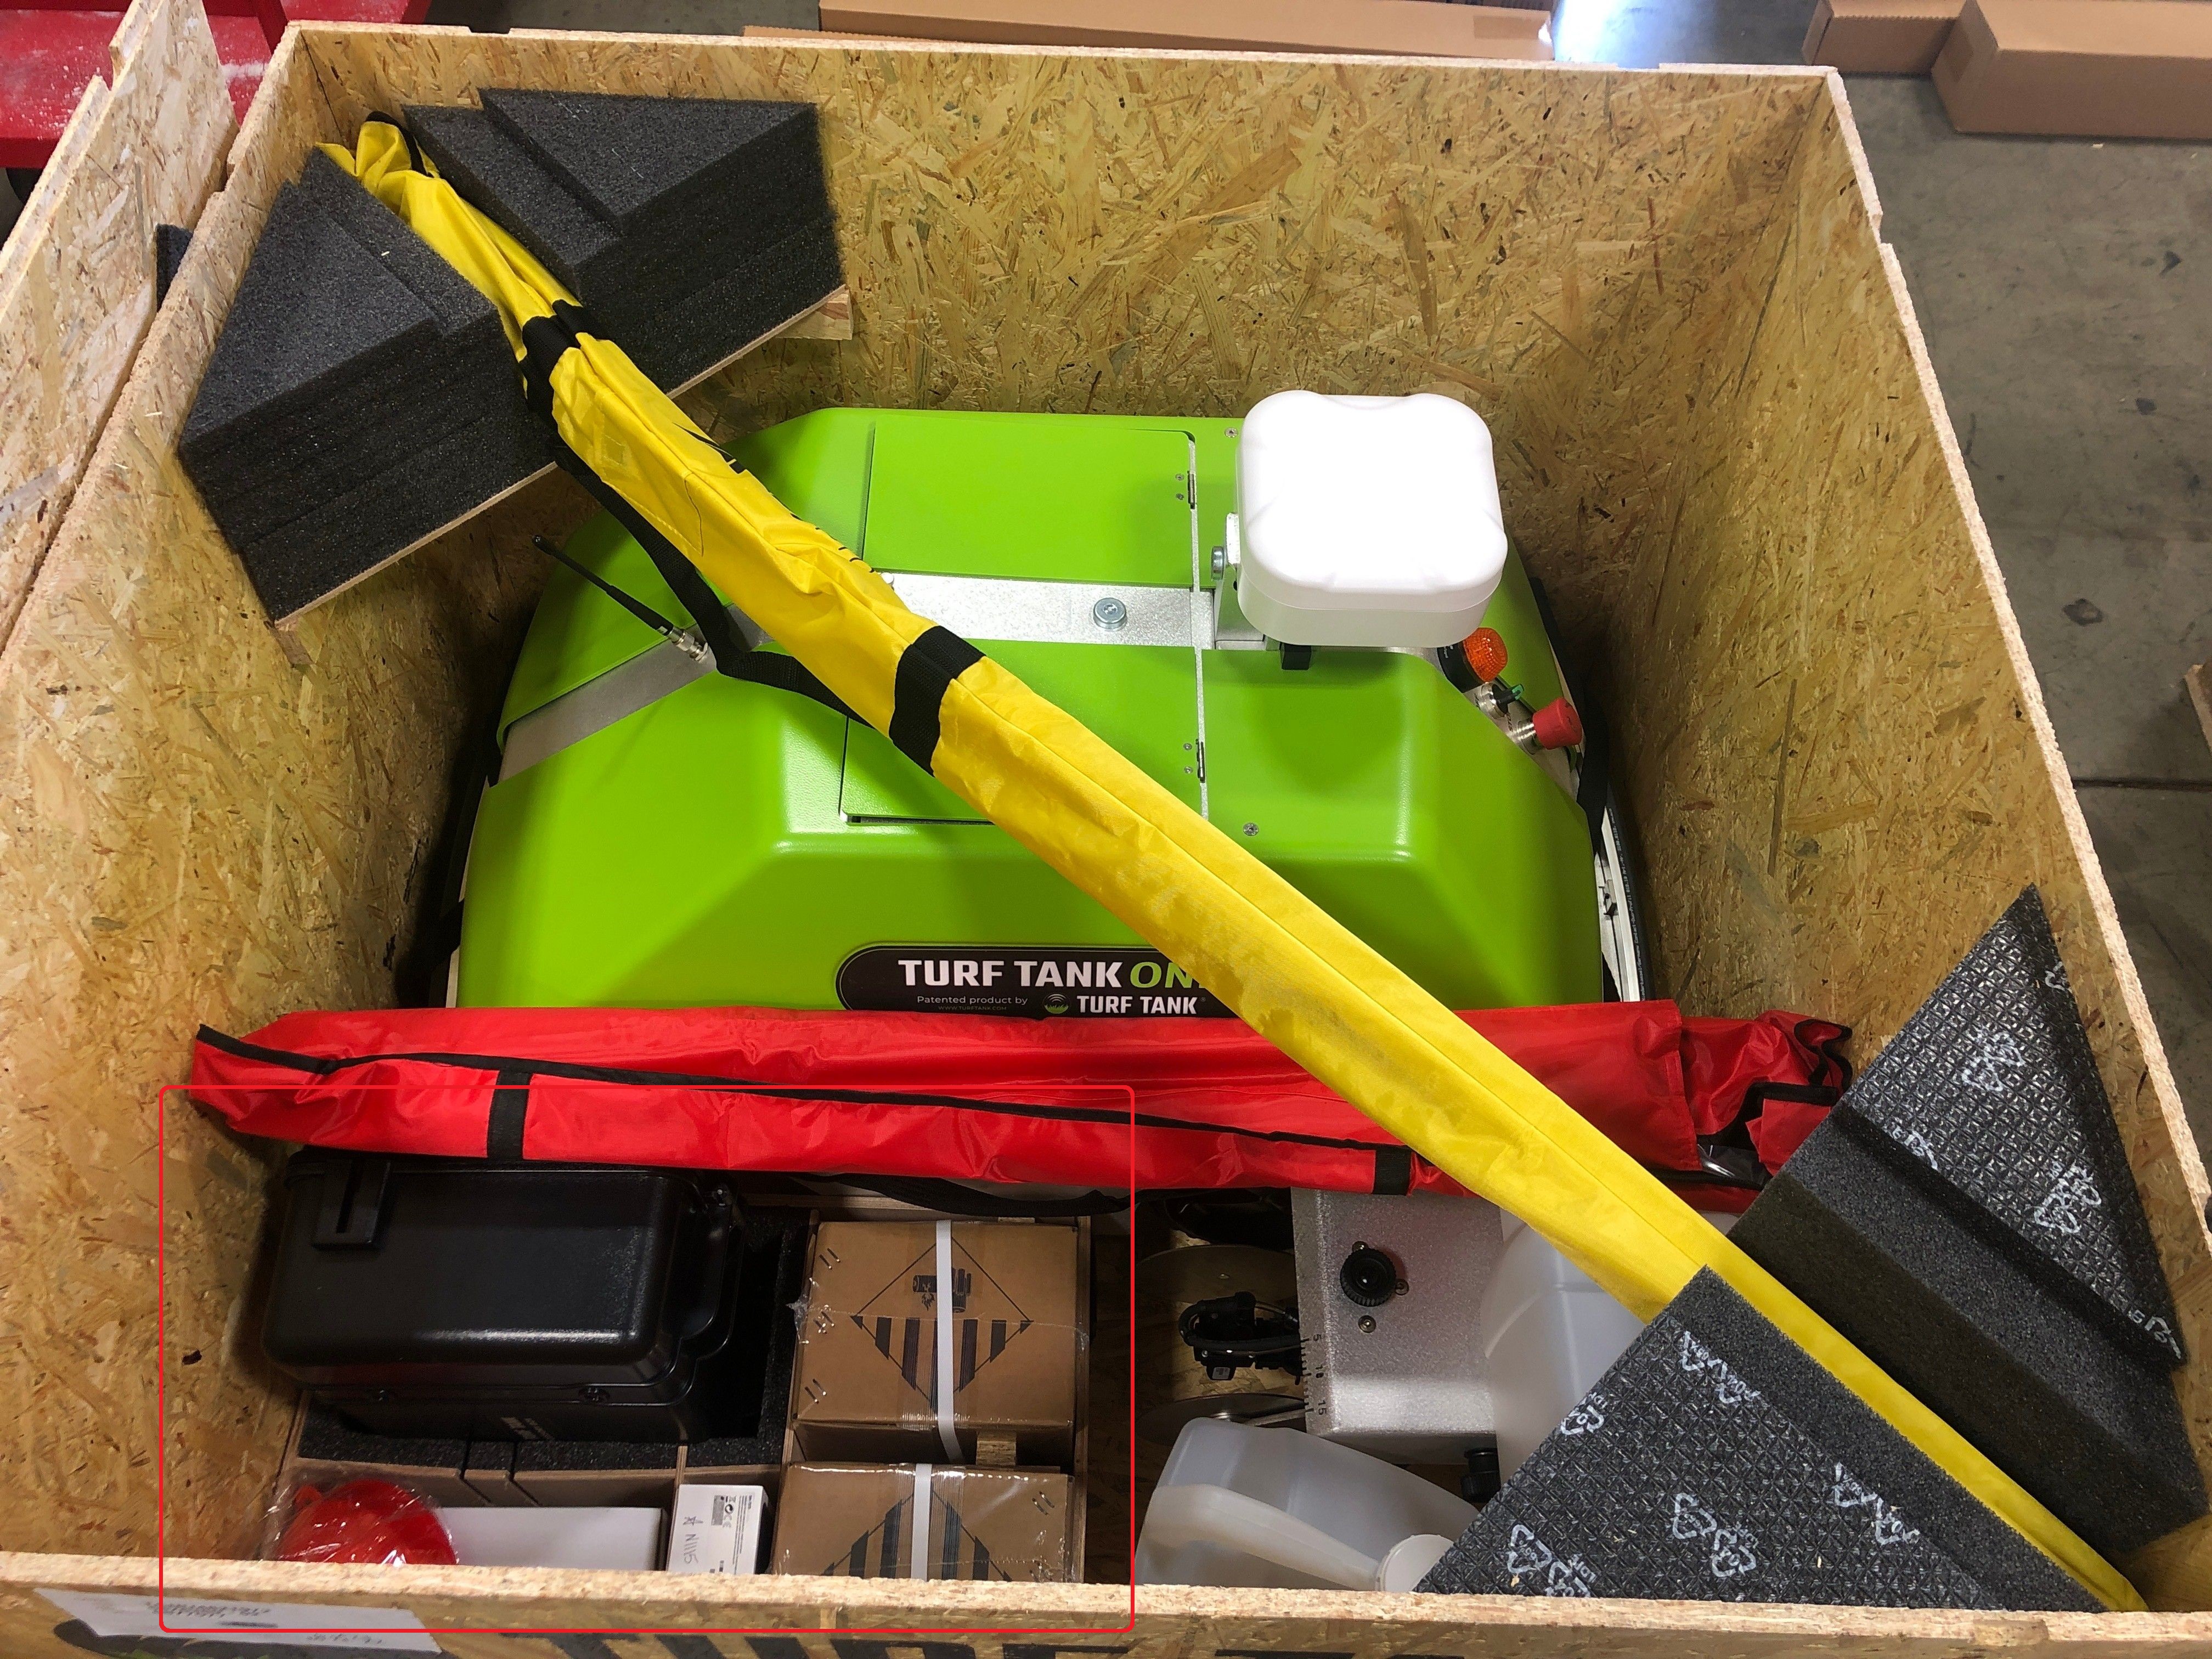
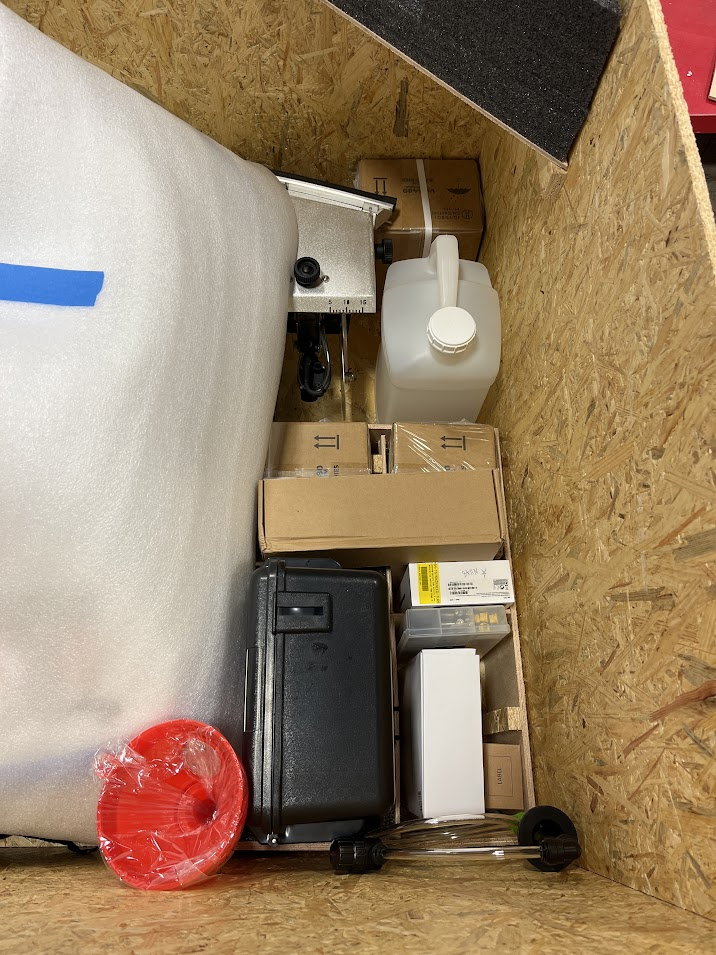
Fully packed crate with accessory container highlighted in red.
Depending on your subscription level and what is included in your package, the crate contents will look slightly different.
In all cases, however, most of the additional accessories for the Robot are found within an internal container built into the crate. [see above]
2. Retrieve and Assemble Charging Components
As all components must be fully charged before Installation, start by removing all chargeable accessories from the crate.

Detailed instructions for charging all components can be found in the Turf Tank One+ Product Manual: https://support.turftank.com/product-manual-turf-tank-one-plus/current/charge-batteries
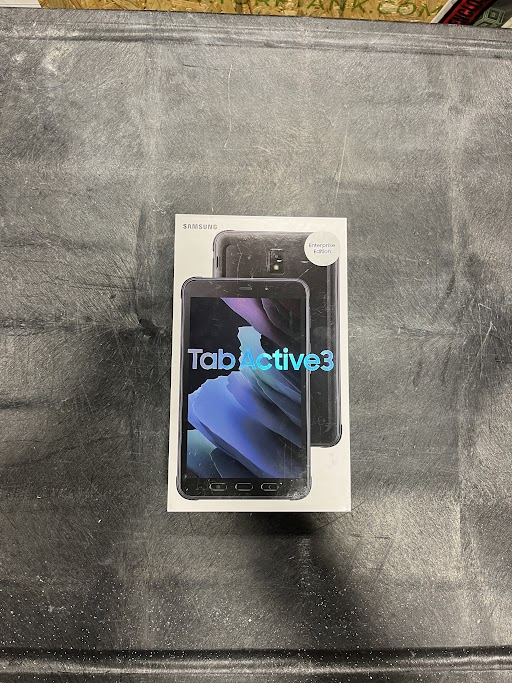
Samsung Tab Active3 Tablet
White Samsung box labeled Tab Active3.
Robot Battery Charger
Plain white box next to Tablet box in accessory container.
Lithium-Ion Robot Batteries
One or two shrink-wrapped brown boxes located in the accessory container area.
The accessory container has only two slots for battery boxes. Pro customers will find their third battery nearby (not within the accessory container) in another shrink-wrapped brown box.
Base Station Batteries and Charger
Pole Battery: Pro customers
Packaged in a skinny cardboard box with its charging cable.
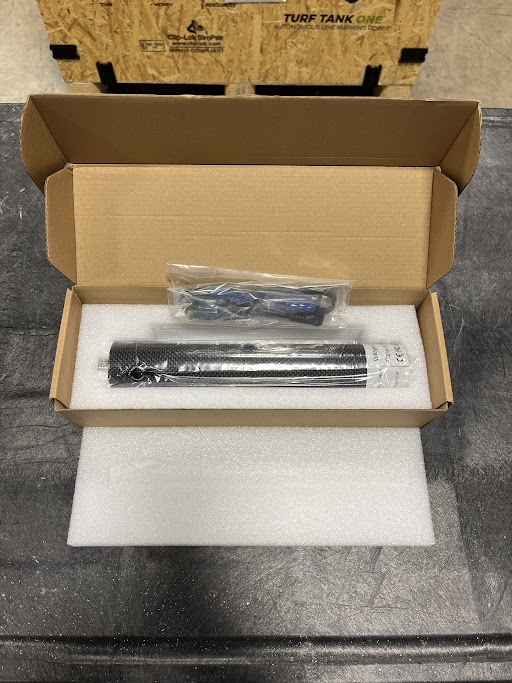
The Pole Battery Charger Adapter Cable and Block are in a separate brown cardboard box in the accessory container.
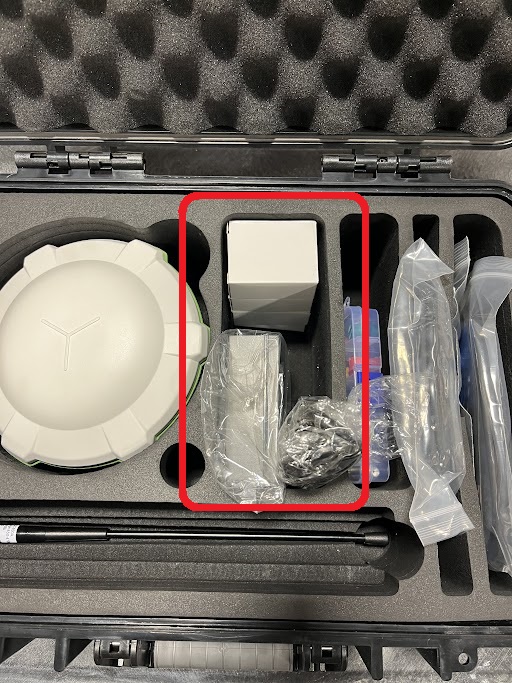
LP-E6 batteries: Plus (four batteries) and Basic (two batteries) customers
Packed in the black Accessory Box in individual cardboard boxes.
Charger packed next to the batteries inside the black Accessory Box.
3. Unpack Robot Accessories
Accessory Box (black suitcase) contents:
Pro Package:
Base Station
Base Station Antenna
LEMO 7-Pin DSUB USB Cable
LEMO DSUB 9 Pole Cable
Pole battery connectors
Mini Spray Kit
Robot antenna (generally attached to Robot, but if it isn’t, it will be in the Accessory Box).
Plus and Basic Packages:
Base Station
Base Station Antenna
LEMO 7 Pin DSUB USB Cable
LEMO DSUB 9 Pole Cable
LP-E6 Batteries Plus: four; Basic: two
LP-E6 Battery Charger
Mini Spray Kit
Robot antenna (generally attached to Robot, but if it isn’t, it will be in the Accessory Box).
General crate accessory contents:
Empty jugs
For Pro customers, an empty judge may be stored inside the Robot’s Battery/Paint compartment
5.5 gallon. Pro: Two; Plus and Basic: One
2.5 gallon Pro and Plus: Two; Basic: Zero
Funnel
Pro Spray Kit (Pro customers only) - packed in accessory container next to Robot Battery Charger
Service Kit (Pro customers only)
Extra Pump
Extra Sprayer unit (aka “solenoid”)
Extra Suction Rod with Tubing, stored inside the Robot’s Battery/Paint compartment
4. Uncrate the Robot

The side walls of the crate will fall away once enough clips are removed. Use caution.
Remove all box clips from each side of the Robot crate.
Unlock the straps securing the Robot by pressing the silver clip.
Slip the black strap through the clip to loosen the straps.
Pull the straps free from each bumper, front and back.
With a person at each bumper, gently lift the Robot from the pallet and place on firm, flat ground.
Two people must lift the Robot out of the crate.
Organize Your Robot and Its Components
As you remove items from the crate, it is helpful to mark each off the checklist to ensure you have received everything you should have.
Show the checklist to the Field Operations Engineer who does your Installation and Training so they can be certain you have all you need.
Set up the area where you will be storing your Robot or its accessories so you have easy access to everything you need. Some users like to create permanent charging stations, which can help keep all your components charged and accessible whenever you need them.
Consult your Field Ops Engineer or the Support Line (770-818-6020) for additional tips on storage and organization.